• 0

Author: Ashley Jane

Thrillers That Weren’t For Me (But Might Be For You)

woman reading a book in front of white bookshelf

Thrillers That Weren’t For Me (But Might Be For You)
Not every thriller book is a bad book. Sometimes it’s just not my thriller book.

I’m picky about thrillers and I’ve realized I have a few “red flags” that will make a story fall flat for me fast. So this isn’t a drag on any author, and I’m not telling you not to read these. These are thrillers that weren’t for me, but they might be for you depending on your thriller taste. If you want a thriller that actually did work for me, here’s my review of The Boyfriend by Freida McFadden.

So if you’re a thriller reader who likes honest opinions (without all the dramatic “worst book ever” energy), here are four popular thrillers that weren’t for me, why they didn’t work, and who I think they might be perfect for.


My Thriller Red Flags

What usually makes a thriller not work for me:

  • When it’s marketed as a thriller but reads more like romance or drama
  • When the middle gets too messy and loses the main plot
  • When characters feel off or the writing choices pull me out
  • When the ending doesn’t have enough payoff and I’m left like… “that’s it?”
  • When characters of color are written in a way that feels off, unnecessary, or distracting

If any of these don’t bother you, honestly you might have a better time with these than I did. Heads up: this post may include affiliate links. If you click and buy, I may earn a small commission (at no extra cost to you)!

Four Thrillers That Weren’t For Me

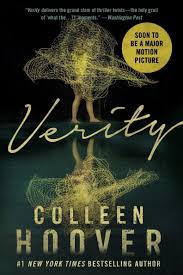
1) Verity — Colleen Hoover


Premise

Verity follows a writer who’s hired to finish a bestselling author’s book series after an accident leaves that author unable to continue. But once she enters the author’s home and life, she finds a manuscript full of disturbing “truths,” and things get messy fast.

It wasn’t for me because…

I kept waiting for the suspense to really kick in, but for me this read more like romance/drama with a dark twist than an actual thriller. It didn’t feel suspenseful or intense the way I want thrillers to feel. I wasn’t on the edge of my seat… I was more like “okay so… when are we getting to the THRILL?”

And I’ll be honest, the writing style felt immature in a way that made it hard for me to take the story seriously. I’ve heard people say that’s a thing with some of Colleen Hoover’s books, and I definitely felt it here. It just wasn’t the type of writing voice I enjoy in this genre.

But you might like it if…

You love relationship mess, obsession, shock value, and books that feel like a fast binge-read. If you like thrillers that lean more emotional, dramatic, and scandalous, this might be your kind of chaos.

Also… she’s clearly doing something right because there’s a movie coming and Anne Hathaway is going to KILL it. I’m honestly more excited for the film version than the book.

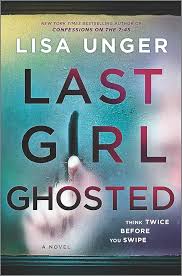
2) Last Girl Ghosted — Lisa Unger

Premise

This one follows a woman whose online dating experience turns into a mystery when a man she’s been seeing suddenly disappears, and she starts realizing she might not be the only one he’s done this to. It’s a modern thriller with that “something is not adding up” vibe from the start.

It wasn’t for me because…

This one actually started strong. It was well-written, the plot idea was interesting, and it pulled me in fast. But somewhere in the middle, it started getting too in the weeds. The story felt like it was juggling too many directions at once, and it lost some of the focus that made the beginning so gripping.

I also felt like the most interesting part of the story was the angle involving the past girls and their situations, and I wish the book leaned harder into that and what it meant with the characters of the book. That part had the most potential to be intense, haunting, and emotionally heavy. Instead, it felt like the story rushed through pieces that could’ve been more developed, and then suddenly we were at the conclusion.

But you might like it if…

You enjoy modern mysteries, online dating thrillers, missing person stories, and books with a steady slow-burn unraveling. If you like a plot that gets more complicated as it goes, you might love this one.

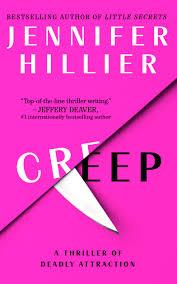
3) Creep — Jennifer Hillier

Premise

Sheila Tao is a psychology professor who’s engaged, but she ends up in an affair with her graduate teaching assistant, Ethan. When she tries to end it and move on with her life, Ethan does not take rejection well and things spiral into blackmail, obsession, and a nasty cat-and-mouse situation.

It wasn’t for me because…

I tried so hard to like this book because the premise is strong and the thriller angle is definitely there. But I spent most of the book frowning. The story kept pulling me out instead of pulling me in.

And I’m going to say it plainly: I didn’t like how the book wrote characters of color. But to be fair, as little as they were in there at least she tried to put them in versus other authors. Certain choices felt off to me, and once that feeling set in, it kept distracting me from the suspense. So even when the plot was doing what it was supposed to do, I wasn’t enjoying the reading experience. I finished it, but it just wasn’t for me.

But you might like it if…

You like darker thrillers that lean into obsession, control, and “this is getting worse by the page,” and you don’t mind characters making messy decisions that set the whole plot on fire.

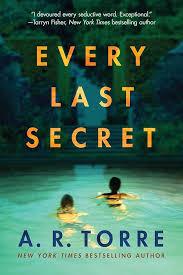
4) Every Last Secret — A.R. Torre

Premise

This is a domestic/psychological thriller about two couples in a wealthy neighborhood: Cat and William Winthorpe, and their new neighbors Neena and Matt Ryder. Neena becomes fixated on William and the Winthorpes’ lifestyle, and the story turns into a rivalry between Cat and Neena that escalates into manipulation, secrets, and a lot of calculated behavior.

It wasn’t for me because…

It wasn’t that A.R. Torre cannot write, the writing is strong and the alternating perspectives are one of the best parts of the book. I also liked the way the characters were drawn because you can feel the power struggle.

But the payoff didn’t hit for me. I got to the end like… okay? That’s it? I wanted more suspense and more “thriller” energy. It felt like it was building toward something sharper or more shocking, and then it just kind of… landed. So I walked away disappointed because I could see the potential, but it didn’t deliver the impact I wanted.

But you might like it if…

You like rich-neighborhood drama, messy power dynamics, and psychological tension that’s more about rivalry and control than jump-scare twists.

Final Thoughts

If you loved any of these thrillers, don’t jump me 😂 they just weren’t for me. Everybody’s thriller taste is different, and sometimes a book can be popular as hell and still not hit your personal buttons. These are just the books that weren’t for me, but they might be perfect for you depending on what you like. And if you have a thriller that actually delivered suspense the whole way through and had a real payoff at the end… I need recommendations immediately. I’m always looking for my next “can’t put this down” read.

Selling Stuff to Pay Down Debt: How I Track It So I Stay Consistent

Selling Stuff to Pay Down Debt: How I Track It So I Stay Consistent

If you’ve ever tried selling stuff to pay down debt, you already know the hardest part isn’t listing one thing. The hardest part is staying consistent.


Because you’ll sell something, feel proud for 10 minutes, and then the money disappears into life. Groceries. Gas. Random adult emergencies, like my plant medicine 😅. Then you’re back feeling broke like nothing changed, and it’s hard to stay motivated.

 

So this is the setup I’m doing right now, so when I’m back home and ready to sell again, I don’t quit after two sales. No complicated budgeting. No perfect plan. Just a simple system that makes it easier to follow through and actually see progress.


If you’re still deciding what to sell first, I wrote a full breakdown here: What to Sell First to Pay Down Debt (And How to Track Your Progress)

Why selling stuff to pay down debt feels pointless without a system

Selling your stuff is a great idea in theory. It’s quick money, it clears space, and it feels like you’re finally doing something.

But a lot of people stop because:

  • they don’t know what to sell next
  • they can’t find the item after it sells
  • they forget where they listed it
  • fees eat more profit than expected
  • the money gets absorbed into regular life
  • they can’t see progress, so it stops feeling worth it

And I get it. When you’re already overwhelmed, you’re not trying to become a full-time reseller. You’re just trying to make extra money without stressing yourself out even more.

Step 1: Pick a realistic sell list you can actually finish

I’m not doing the thing where I list 30 items in one day and then hate my life.

I’m starting with 10 sellable items. That’s enough to build momentum without turning my home into a storage unit.

Some easy categories to start with:

  • kitchen gadgets you never use
  • clothes you keep skipping over
  • decor you’re bored of
  • unopened beauty products
  • old tech that still works
  • random “why do I own this” items

The goal is not to sell your entire life and certainly not the items that you absolutely love and want. The goal is to get quick wins that make you feel like this is possible.

Step 2: Create one “sell zone” so you don’t re-clutter everything

This is the part that makes selling feel messy. You start pulling things out and suddenly you’re surrounded by piles.

So I’m doing one designated spot:

  • one bin, basket, or corner that is clearly labeled SELL
  • everything going for sale goes there
  • nothing moves until it’s time to take pictures and wrap them up with a label system.

If something sells and you can’t find it, that will make you quit. It’s frustrating, it’s stressful, and it makes the whole process feel not worth it. So I’m avoiding that from the start.

Step 3: Take photos in batches so the listing doesn’t feel exhausting

Listing feels hard when you do everything one item at a time.

Batching makes it easier:

  • set up good lighting once
  • take all photos at once
  • upload them later
  • write descriptions after

Even if I don’t post anything for another week, having photos ready makes it so much easier to follow through.

Quick photo checklist:

  • one clear front photo
  • a close-up of the brand/label
  • a close-up of any flaw (so nobody can argue later)

Step 4: Decide your pricing boundaries before anyone starts negotiating

Negotiation is where people start spiraling.

So I set two numbers:

  • Price Goal: what I want to get
  • Lowest I’ll Take: the number I won’t go under

That way, if someone offers something annoying, I’m not sitting there debating my whole life. I already decided.

Step 5: Track fees, because this is where the money “disappears”

This part isn’t fun, but it matters.

If you sell something for $40 but:

  • shipping takes a chunk
  • platform fees hit
  • you had to buy supplies

Your profit is not what you think it is.

And when you don’t track fees, it starts to feel like you’re doing all this work for nothing. That’s one of the biggest reasons people stop selling stuff to pay down debt after a few sales.

Step 6: Make a rule for where the money goes (so it actually counts)

This is what turns “selling stuff” into actual progress.

If you don’t decide what happens to the money, it will disappear into random spending. Not because you’re irresponsible. Because life is life.

My rule is simple:

Every sale gets applied to a specific debt on purpose.

Even if it’s $8. Even if it’s $15. It counts. Progress is progress. If you sell a $12 item and apply it to debt, that’s still progress. The point is stacking small wins until it finally feels like momentum.

Step 7: Track it so your brain believes it’s working

This is the difference between “I sold something” and “my balance actually moved.”

Selling stuff to pay down debt works better when you can see the proof:

  • what sold
  • how much you made
  • what the fees were
  • what you actually earned
  • which debt it went to

Because when you can see the progress, it stops feeling pointless. It starts feeling like momentum.

That’s why I made a simple tracker to keep everything in one place and make the progress feel real. If you want to try the same setup I’m using, grab it below: 

👉 Sell-to-Debt Notion Tracker

👉 Sell-to-Debt Excel/Google Sheet Tracker


If you want to start today, do this

Keep it simple. Don’t turn it into homework.

  1. Pick 10 items
  2. Put them in your sell zone
  3. Take photos in one batch
  4. Decide your price goal + lowest price
  5. Track your first sale so it feels real

That’s it. That’s the setup.

You don’t need a perfect plan. You just need a system you can stick with. You can do this! I’m sure gonna try!

What to Sell First to Pay Down Debt (And How to Track Your Progress)

What to Sell First to Pay Down Debt (And How to Track Your Progress)

If you’re anything like me, you’ve had that moment where you look around your apartment, and you’re like, yeah, I have too much stuff. And also, yeah, my debt is not playing with me.

I’m not here to pretend I’m a finance expert. I’m just a regular person who wants more breathing room. And honestly, selling my stuff has been one of the only things that feels doable when I’m overwhelmed.

But I’m going to tell you the real truth:

Selling things only helps if you can actually see that it’s helping.

Because if you sell something, the money disappears into life, and you can’t tell if your debt went down at all, you’ll stop. That’s human.

So this post is about two things:

  1. What to sell first if you’re trying to make quick money
  2. How to track it so you don’t burn out and quit after two sales

What to Sell First (Start With the Easy Wins)

When people say “sell your stuff,” that sounds cute until you realize you don’t know what to sell. So here’s how I’ve been doing it, without making it a whole emotional journey.

1. Kitchen stuff you do not use

This is the fastest category because people love “barely used” kitchen items.

  • air fryer you don’t touch anymore
  • blender you swore you’d use for smoothies
  • extra pots/pans
  • random gadgets (waffle maker, rice cooker, etc.)

If it’s taking up space and you don’t even like it… it can go.

2. Clothes you keep skipping over

Not the sentimental stuff. Not the “maybe one day” stuff.

I mean the clothes you don’t even reach for, even when everything else is dirty.

  • jeans that don’t fit how you want
  • shoes you never wear
  • coats and bags you forgot you had
  • anything with tags that’s been sitting there for months

3. Home decor you’re over

This is one of the easiest sells because home stuff is always rotating.

  • lamps
  • wall art
  • organizers you bought in a motivated mood
  • little side tables
  • mirrors

If you wouldn’t buy it again today, it can go.

4. Beauty stuff you don’t use

I’m not saying sell half-used skincare unless you’re comfortable with that, but you’d be surprised what people buy when it’s:

  • unopened
  • brand new
  • limited edition
  • or still in packaging

Think backups, sets, tools, and bundles.

5. Old tech + electronics

Tech sells. Period.

  • headphones
  • keyboards
  • controllers
  • old tablets/kindles
  • small speakers
  • ring lights

If it still turns on, it has value.

The Part Nobody Talks About: Why Selling Still Feels Like You’re Broke

Here’s the part I had to accept:

Selling things doesn’t automatically fix anything.

Because you can sell three things and still feel like nothing changed.

Why?

  • fees eat your profit
  • you forget what you listed where
  • you don’t remember what sold
  • the money goes to food, gas, random life things
  • you don’t apply it to anything specific
  • you lose momentum because nothing feels real

That’s where I used to get stuck.

Like yes, technically I made money. But I couldn’t prove it to myself, so it didn’t feel motivating. And motivation matters when you’re trying to stay consistent.

My Simple System: Sell → Track → Apply It to Debt on Purpose

This is the only way it started feeling worth it for me.

Not complicated. Not perfect. Just consistent.

Step 1: List the item and give it a quick “code”

This is optional, but it helps so you don’t lose track of what’s what.

Example codes:

  • KITCH-01
  • CLOTH-02
  • HOME-03

It doesn’t have to be cute. It just needs to make sense to you.

Step 2: Track the sold price and fees

This is where people get annoyed, but it matters.

If you sold something for $35 but fees were $6 and you forgot that… you’re going to think selling is pointless.

Tracking the fees is how you stop lying to yourself about profit.

Step 3: Apply the sale to a debt you’re paying down

This part is the game-changer.

Instead of “I sold something and now I feel slightly less stressed,” it becomes:

I sold something and it went to THIS debt.

My balance moved.

My effort mattered.

That’s what keeps you going.

How to Stay Consistent (When You’re Not in the Mood)

This is the part people don’t want to admit, but I will:

You don’t stop because selling is hard.

You stop because it starts feeling pointless.

So I started making it easier on myself.

These small things helped a lot:

  • keep a bag/bin for “listed items” so you’re not searching later
  • take photos once and save them in a folder
  • keep a few boxes and mailers on hand
  • tape, scissors, marker in one place (do not make yourself hunt for supplies)
  • write the item name the same way every time so tracking stays clean

Basically, reduce the friction so you don’t quit.

The Tracker I Use to Make Progress Feel Real

I made a simple tracker for this because I needed something I’d actually keep up with.

It’s built to help you:

  • list what you’re selling
  • track sold price + fees
  • see your net earnings
  • apply each sale to a debt
  • and watch your balance go down

Nothing fancy. Just effective.

If you want it, you can grab it here:

👉 Debt Declutter Selling Tracker for Excel and Google Sheets

👉 Debt Declutter Selling Tracker for Notion

Or make your own with the guidance of my system above!

If You Want to Start Today (Do This)

Not tomorrow. Not “when you have time.” Today.

  1. Pick 5 items you can live without
  2. List 2 of them
  3. Put the listed items in one spot so you don’t lose them
  4. Track the sale when it happens
  5. Apply it to one debt on purpose

Even if it’s $10. Even if it’s $20.

Progress is progress.

And if you can see it, you’ll keep going. That’s what I’m hoping for! 

5 Cozy Ways to Use Cannamilk at Home

5 Cozy Ways to Use Cannamilk

Close-up of a barista pouring creamy milk into coffee, representing how to use homemade cannamilk in drinks.

If you’ve been wondering what to make with cannamilk, this post is your sign to use it!

Picture this, you’ve finally made your first batch of cannamilk, it’s chilling in the fridge looking all proud of itself, and now you’re wondering, “Okay… what can I actually make with it?” Cannamilk is the cozy base of every infused recipe you’ll ever love. Here are five of my favorite things to make with cannamilk when I want something easy, comforting, and just a little bit elevated.

This post may contain affiliate links. If you buy something through one of them, I may earn a small commission at no cost to you. I only link things I actually use and love.

1. Infused Hot Cocoa

This one’s a classic. Warm up a cup of cannamilk, whisk in cocoa powder, sugar, and a pinch of cinnamon. That’s it. I like topping mine with infused whipped cream (yes, a double dose of fun) and sipping it while I scroll or read on my Kindle.

🖇 Want to learn how to make it? Check out my How to Make Infused Hot Cocoa for Cold Nights post!

2. Cannamilk Pancakes

I love weekend breakfast/brunch. You wake up and make the best pancakes and bacon, served with eggs and toast. Want to elevate it even more? Just swap regular milk for cannamilk in any pancake mix. It gives a soft herbal vibe that pairs perfectly with honey or syrup. And better yet, no hangovers!

Ash Jane’s Pick: Weed leaf waffle maker! Yes, I know, I know it’s a waffle maker, but I couldn’t resist, and I love my similar version at home!

3. Infused Coffee or Latte

I have to admit, when I wake up, if I’m not thinking about my morning sesh, I’m thinking about my decaf coffee. (Yes, decaf, unfortunately, ya girl has a caffeine sensitivity!) If I have a long morning ahead of me and cannot smoke a whole joint, I opt for a splash of cannamilk in my morning coffee or froth it up for a cozy latte. It gives me a huge head start to my day!

4. Cozy Cereal Bowl

This one is a no-brainer. Sometimes you don’t need a full recipe; you need a quick bowl of cereal, and that is totally okay! Pour cold cannamilk over your favorite cereal, light a candle, and call it a moment of soft and leisurely mornings.

5. Infused Smoothie

If you’ve got leftover cannamilk, toss it in a blender with banana, strawberries, blueberries, milk, yogurt, some flax seeds and protein powder. Congrats, you just made yourself a yummy infused strawberry blueberry banana smoothie! I tend to make these before a pilates workout. (I’m trying so hard to become a pilates hottie!)

Those are my favorite things to make with cannamilk when I want to keep it simple but still feel like I’m living my cozy, herbal, soft-life dream. Some days I want the hot cocoa, other days I’m much more likely to throw something fruity into the blender and call it breakfast, but I like having a few easy options depending on what I’m in the mood for.

Want More Ways to Use Cannamilk? Try My Cannabis Smoothie Recipes

If the infused smoothie is sounding especially good right now, I put five of my favorite cannabis smoothie combinations into a free recipe pack, including fruity, chocolatey, citrusy, and green options using cannamilk, cannahoney, and cannabutter. Grab it below and save it for the next time you want something a little different from your usual cannabis routine.

How to Make Infused Hot Cocoa for Cold Nights

How to Make Infused Hot Cocoa for Cold Nights

There’s something about cold nights that makes me crave cozy everything, and this canna-infused hot cocoa recipe has become my favorite way to wind down when the nights get long. This infused hot cocoa is one of my favorite night rituals when I want to wind down, get a little high, and feel like I’m wrapped up in a hug.

This post may contain affiliate links, which means I might earn a small commission at no extra cost to you. I only link to things I actually use or love.

🍫 Why I Love This Recipe

I’m not a complicated edible girl. I like simple, cozy things that hit slow and smooth, and this recipe checks every box. It tastes like regular rich hot cocoa, but the infused butter or honey adds just enough kick to make a cold night feel soft around the edges.

You can make it with cannabutter, canna honey, or even cannamilk if you’ve already made that before, if not, I have recipes of that linked in the ingredients! The high comes on mellow and cozy, perfect for quiet nights, movies, or writing when your brain needs to chill but not shut off.


What You’ll Need

You don’t need anything fancy, but a cute mug makes everything taste better.

Here’s my setup (1 serving) lately:

  • 1 cup milk or alt milk (I like oat or almond)
  • 1 tbsp cannabutter or canna milk (check out my posts linked to learn how to make them!)
  • 2 tbsp cocoa powder (or your favorite mix — I love this one on Amazon)
  • 1 tbsp sugar or maple syrup
  • pinch of salt
  • whipped cream, marshmallows, or drizzle (optional)
  • Cute mug + spoon set for the cozy aesthetic
  • Optional: Milk frother — it makes the texture velvety and café-level smooth

☕️ How to Make It

  1. Warm your milk on low heat, don’t boil it!
  2. Stir in cocoa powder and sugar until it’s silky.
  3. Add your cannabutter (or cannamilk) and let it melt in completely.
  4. Whisk or froth it up until everything looks rich and smooth.
  5. Pour it into your favorite mug, top it with whatever feels cozy, and sip slow.

It’s simple, but the flavor hits deep — sweet, creamy, and warm enough to melt away a long day.

🌿 Dosing Notes (Keep It Chill)

If you’re using a new batch of cannabutter or cannamilk, start with a light dose, about ½ teaspoon to 1 teaspoon. Sip slowly, wait at least an hour, and then decide if you want more. Infused drinks hit differently than baked edibles, especially when there’s fat (like milk or butter) involved.

And if you make extra, keep it in the fridge. Warm it up the next night for instant coziness without the cleanup.

Sometimes I roll up after I finish my mug; sometimes I’m already there before the first sip. Either way, it’s become my favorite cold-night ritual. This isn’t just about getting high; it’s about slowing down, softening up, and letting your space hold you for a bit. Try out this recipe now!

Cozy Apartment Reset for Winter

Cozy Apartment Reset for Winter

Every year when the air changes, my apartment starts feeling heavier. The windows stay shut, the days grow shorter, and everything starts to blend. Before I know it, I’m walking around in my robe, wondering why my place feels like a cave. This usually happens at this time, with the seasonal depression coming around. That’s when I know it’s time for a reset, not the scrub-the-baseboards kind, but a mood shift. A cozy reset that makes my space feel like a soft landing again and gets me through this winter!

This post may contain affiliate links, which means I could earn a small commission at no extra cost to you. I only share things I genuinely use or love.

Reset the Air

First step: clear the energy. I keep my AIRROMI air purifier running almost every day in the winter. It’s quiet, looks cute in green, and somehow makes the air feel lighter, which is remarkable, but true. Once the air feels clean, I take out my favorite candles. I’m not trying to babysit flames anymore, so I started using this super chic candle warmer lamp. The warmer emits that same soft glow and slowly melts whatever scent I’m obsessed with that week. Right now, it’s the now-discontinued White T-shirt candle from Bath and Body Works (PLEASE BRING IT BACK, I ONLY HAVE 1 MORE LEFT!). It makes my space smell warm and soft without trying too hard.

Warm Up While Hanging Out

Instead of that big “blanket warmer” everyone talks about (which, don’t get me wrong, I love), I grabbed a heated hoodie that is my lifesaver when I need a warm smoke break and drink. It’s a cute strawberry-themed plush hoodie, and it looks way more intentional than those stiff, heated blankets that scream “utility.” I’ll curl up under it when I’m working or watching something mindless, and it genuinely feels like being tucked inside a cloud.

Lighting matters too. I prefer warm, layered lighting, with lamps over overheads, candles over LEDs – always cozy but never bright. If you can find a mini space heater that doesn’t compromise your vibe, go for it! I’m still deciding on my favorite mini space heater, but this one is a great one to start with!

Little Luxuries That Change Everything

My “cozy reset” always ends with something that smells good and feels good. After a shower, I mix Brown Sugar Babe body oil with Taraji P. Henson’s Anything Glows Vanilla oil and stand there, glowing, as if I have my life together. It’s not about self-care checklists; it’s just a moment where everything slows down.

Then I roll up, make tea (sometimes regular, sometimes infused), and throw on a playlist that feels like golden hour, melting into the night. Cozy isn’t about buying new things; it’s about making what you already have feel like peace.

By the time I finish, my apartment smells like calm, my skin’s glowing, and my brain finally slows down. It’s simple stuff, but it changes everything. A cozy reset isn’t about perfection; it’s just a reminder that your space should love you back.

How I Use Cannabis-Infused Smoothies Instead of Smoking First Thing

How I Use Cannabis-Infused Smoothies Instead of Smoking First Thing

I absolutely love my wake and bakes. There is something about that first part of the morning, or afternoon if I slept in, when I can roll a joint, make my coffee, sit for a minute, and have a little time to myself before I start tackling whatever I have planned for the day.

But sometimes I want the cannabis without smoking first thing, which is how I started making cannabis-infused smoothies with things like cannamilk, cannahoney, and cannabutter. They have become one of my favorite alternatives to a morning joint when I still want to enjoy cannabis but do not necessarily want to start my day by smoking.

The problem is that now that I am in my 30s, sometimes the joint-and-coffee combination hits a little differently than it used to. There are mornings when it is exactly what I want, and then there are mornings when I realize I have completely overcommitted to the vibe and still have an entire day of things that actually need to get done.

Combined with trying to get more consistent with my workouts and making better choices in the kitchen, I started thinking about other ways I could keep the part of my morning cannabis ritual that I love without automatically reaching for a joint the second I get up.

For a while, I kept it extremely simple and would take a little distillate under my tongue, then wait until later in the day to smoke. It worked, technically, but I hated it. Going from rolling a joint, making my coffee, and having an actual morning ritual to taking one little drop and moving on with my life was just not doing it for me. I really wanted something with a little more personality.

And if there is one thing I love almost as much as cannabis, it is beverages. I am absolutely one of those people who can have water, coffee, something sparkling, and something fruity sitting around me at the same time, and I give no apologies for it. Once the idea of cannabis-infused smoothies popped into my head, it made almost too much sense. I already had fruit, I already had a blender, and I was already making different cannabis infusions at home, so really all I needed to do was put everything together.

I Was Not Trying to Become a Wellness Girlie Overnight

This was never about waking up one morning and deciding I needed to start tracking macros, buying twelve different powders, or turning my kitchen counter into a supplement store. I just wanted another way to enjoy cannabis in the morning that still felt like something.

Smoothies already worked for me because I usually have fruit around, I can make one without turning breakfast into an entire project, and there are enough combinations that I do not feel like I am drinking the exact same thing every day. Once I realized I could use some of the cannabis infusions I was already making, it really opened things up.

How I Make Cannabis-Infused Smoothies

Most of the time, I use cannamilk or cannahoney because they work really well with fruit, but I also use cannabutter in some of the richer smoothies, especially the ones that lean more dessert than breakfast.

For something fruity, I usually reach for cannahoney because it blends in easily and adds sweetness without changing the whole flavor of the smoothie. For creamier blends, cannamilk makes the most sense because I can use it the same way I would use regular milk or almond milk.

And then there is cannabutter, which I like much more in smoothies with things like chocolate, peanut butter, or banana. My Choco-High Peanut Butter Smoothie uses almond milk, cocoa powder, peanut butter, frozen banana, and melted cannabutter, and it is definitely one of the more dessert-style options in the pack.

I also sometimes use distillate if that is what I already have on hand, although I am much more careful with it because it is easy to underestimate how much you are adding when you are just squeezing a little into the blender. The biggest thing for me is that I am not trying to force the exact same cannabis ingredient into every smoothie just because it is infused. I would rather use whatever actually works with the flavor I am making.

Cannamilk, Cannahoney, or Cannabutter?

I already use cannamilk in a few different ways, and smoothies were an easy addition because I could swap it in anywhere I would normally use milk or a nut milk.

Cannahoney works especially well when I am making something fruity or citrusy, which is why I use it in smoothies like my MangoBerry Bliss and Orange High Dream.

The MangoBerry Bliss uses mango, mixed berries, a liquid base, and cannahoney, while the Orange High Dream uses orange juice, yogurt, frozen banana, and cannahoney for something that tastes a little like an infused creamsicle.

Cannabutter is the one I save for heavier flavors because I do not necessarily want buttery strawberry or mango anything, but chocolate and peanut butter can absolutely handle it. The nice thing about having a few different infusion options is that I can make the smoothie around what sounds good instead of making the flavor work around the cannabis.

My Favorite Cannabis Smoothie Combinations

Some mornings I want something bright and fruity because I do not feel like eating anything heavy, especially if I am trying to get moving early. Other days, I want something that feels much closer to dessert, which is when I lean toward chocolate, peanut butter, banana, or something creamier. I also somehow managed to make myself a green smoothie person without actually becoming a green smoothie person.

My Green Pineapple Dream has pineapple, mango, spinach, kale, a liquid base, and cannamilk, with avocado and citrus juice as optional additions. It sounds much more responsible than I normally am before noon, but it is actually really good. I also have my Strawbanana High Smoothie, which is probably the easiest place to start because it is basically a strawberry-banana smoothie with cannamilk added in, and there is nothing overly complicated about it.

I do not follow strict recipes every single time because I am still going to add a little more fruit, use whatever milk I have, or throw in something extra depending on what is in my kitchen that day, but I like having a few combinations that I know work when I do not feel like thinking about it.

Why I Sometimes Choose an Infused Smoothie Instead of a Morning Joint

I have not stopped smoking in the morning forever, and I am definitely not pretending an infused smoothie transformed me into somebody who wakes up at 6 a.m., journals, stretches, and goes for a sunrise run. Sometimes I still want my joint and my coffee. But I like having another option.

There are mornings when I know I need to work, write, clean up around the house, exercise, or just be a little more functional than I might be after getting too comfortable with a joint and a cup of coffee. On those days, making an infused smoothie gives me the ritual part I was missing when I tried simply taking distillate and moving on.

I still get to go into the kitchen and make something. I still get to choose what I want. I still have my little morning moment before everything else starts. It just looks different. And because cannabis-infused drinks and edibles can take time to kick in and can feel very different from smoking, I am careful with how much of my infusion I use. The smoothie pack includes the infusion amounts I normally build the recipes around, but potency can vary depending on how strong your cannamilk, cannahoney, cannabutter, or distillate actually is.

The pack also includes the reminder I use myself, which is to start low and give it time before deciding you need more, because you can always add more next time, but you cannot un-drink the smoothie you already finished.

Get My 5 Cannabis Smoothie Recipes

Once I figured out a few combinations I kept going back to, I decided to put them all together in one place instead of making myself remember what I did every time I pulled out the blender.

The free cannabis smoothie recipe pack includes my Strawbanana High Smoothie, Choco-High Peanut Butter Smoothie, MangoBerry Bliss Smoothie, Orange High Dream Smoothie, and Green Pineapple Dream Smoothie, along with the ingredients, directions, and notes on the different cannabis infusions I use.

You definitely do not need to become a smoothie person every morning, and I have not. I just like having something else in the rotation for the days when smoking first thing sounds great in theory but might not be the best way for me to start the day.

If that sounds familiar, grab the smoothie pack below and steal one of mine, I’m happy to share!