• 0

Category: Tasty Tokes

How to Make Infused Popcorn (Easy Cannabutter Snack)

How to Make Infused Popcorn (Easy Cannabutter Snack)

Warm bowl of cannabis infused popcorn styled on a neutral coffee table for a cozy night in

There’s something about infused popcorn that feels comforting in a way most infused edibles don’t. It’s warm, familiar, and doesn’t require you to commit to a whole dessert situation. That’s exactly why infused popcorn is one of my favorite low-effort edibles to make, especially when I want something cozy but don’t feel like baking or cleaning up a bunch of dishes.

This is very much a girl dinner edible. But probably with a refreshing non-infused beverage not some wine (but no judgement if you want it!). You don’t need fancy equipment, you don’t need to be good in the kitchen, and you definitely don’t need to turn it into a project. If you can make popcorn and melt butter, great news! You’re already qualified!

Quick note before we get into it: this is for adults 21+ only, where cannabis is legal. Go slow, dose intentionally, and don’t let how easy this is trick you into overdoing it.

What is infused popcorn?

Infused popcorn is exactly what it sounds like: popcorn coated with butter or oil that’s been infused with cannabis. Instead of baking THC into something complicated, you’re adding it to something you already eat casually.

What I like about it is how flexible it is. You’re not locked into one serving size, and you don’t have to finish it all at once. You can eat a handful, wait, see how you feel, and decide if you want more. That alone makes it feel way less intimidating than brownies or cookies.

It’s also one of the easiest ways to make edibles that still feel normal. Nothing about infused popcorn feels extra or performative. It’s very “I’m on the couch, the lights are low, and I just want to relax.”

Why popcorn works so well for edibles

Popcorn is forgiving. The butter spreads easily, the texture stays light, and it’s simple to portion without overthinking it. Unlike baked edibles, you’re not guessing how strong one square or one cookie might be. It’s also customizable without feeling like a recipe project. Sweet, salty, spicy, cheesy, whatever mood you’re in, popcorn can match it with almost no effort.

How to Dose Infused Popcorn Safely

The easiest way to control infused popcorn is to infuse the butter, not the popcorn itself. That way, you’re not guessing or unevenly dosing the bowl.

If you already have cannabutter, you’re good to go. If not, you can use  my cannabutter recipe here!

For popcorn, I recommend keeping it light. This is a snack, not a “cancel your plans” edible.

A good range:

  • 5-10 mg per bowl for a cozy, noticeable high
  • 2.5 mg per bowl if you’re sensitive or just want a soft background buzz

Example, no stress math:

If your cannabutter is about 20 mg per tablespoon and you use 1 tablespoon total, that’s 20 mg in the whole batch. Split that into 4 bowls and you’re at 5 mg each.

You don’t need perfect numbers. You just need to be intentional.

How to Make Infused Popcorn at Home

I pop the popcorn however is easiest that day. Sometimes stovetop, sometimes an air popper, sometimes straight from the microwave. The only thing I try to do is keep it plain so the infused butter can shine.

While the popcorn is popping, I melt butter on low heat. Not sizzling, not browning, just melted. Most of the time I do a mix of cannabutter and regular butter so the dose stays reasonable and the flavor stays smooth.

Once the popcorn is ready, I drizzle the butter slowly, toss it, drizzle again, toss again. This part matters. Dumping it all in one spot is how you end up with one dangerously strong corner and the rest dry. From there, season however you want.

Flavor Ideas That Still Feel Elevated

If I want classic cozy, it’s just butter and salt. Sometimes a little nutritional yeast if I want that cheesy movie-night vibe. For sweet girl dinner energy, cinnamon sugar or a light cannahoney drizzle works without turning it into dessert. For a savory, grown vibe, smoked paprika, garlic powder, and a pinch of cayenne is elite with popcorn!

A quick tip so you don’t overdo it

Popcorn is easy to keep eating, especially when you’re relaxed. If you know you snack mindlessly, make two bowls:

  • one infused
  • one non-infused

Eat the infused bowl slowly, wait, see how you feel, and then keep snacking without accidentally doubling your dose. It’s the easiest way to stay comfortable and enjoy the night.

How Long Does Infused Popcorn Take to Kick In?

Like most edibles, infused popcorn can take anywhere from 30 to 90 minutes to fully kick in. Metabolism, tolerance, and whether you’ve eaten recently all play a role. Give it time before assuming it “isn’t working.”

How to Store Infused Popcorn

Store infused popcorn in an airtight container at room temperature for up to 1–2 days. It’s best fresh, but it will hold overnight. Keep clearly labeled and away from children or pets.

Infused popcorn doesn’t feel like a project. It feels like something you can make on a random evening without planning ahead. It’s warm, flexible, and familiar, and honestly, that’s what I want most of the time. I’m just figuring out what feels good and manageable in this season. If you’re building your own cozy edible rotation, I’ll keep sharing what works for me here in Tasty Tokes.

Warm bowl of cannabis infused popcorn styled on a neutral coffee table for a cozy night in

Cannabutter Infused Popcorn

A cozy, low-effort edible made with cannabutter and simple seasonings.
Prep Time 5 minutes
Cook Time 5 minutes
Total Time 10 minutes
Servings: 4 bowls
Course: Dessert, Snack
Cuisine: American

Ingredients
  

  • 1/2 cup popcorn kernels (or 1 microwave bag)
  • 1 tbsp cannabutter
  • 1 tbsp regular butter optional if have microwave bag with butter
  • salt to taste
  • optional seasonings (cinnamon sugar, garlic powder, cheese, etc)

Equipment

  • Large mixing bowl
  • Small saucepan
  • Spoon or Spatula
  • Stove top, air popper, or microwave

Method
 

  1. Pop the popcorn using your preferred method and transfer to a large mixing bowl.
  2. Melt the cannabutter (and regular butter, if using) gently over low heat until fully melted. Do not overheat.
  3. Slowly drizzle the melted butter over the popcorn while tossing to coat evenly.
  4. Add salt and any additional seasonings, tossing again to distribute.
  5. Portion into bowls and consume intentionally, starting with a small serving.

Notes

Dosing will vary depending on the potency of your cannabutter. Start with a small serving (2.5–5 mg THC) and wait at least 60–90 minutes before consuming more. Label clearly and keep out of reach of children and pets. For adults 21+ where cannabis is legal.

No-Bake Infused Valentine’s Day Treats (Made With Cannabutter) + Easy Weed Mocktails

No-Bake Infused Valentine’s Day Treats (Made With Cannabutter) + Easy Weed Mocktails

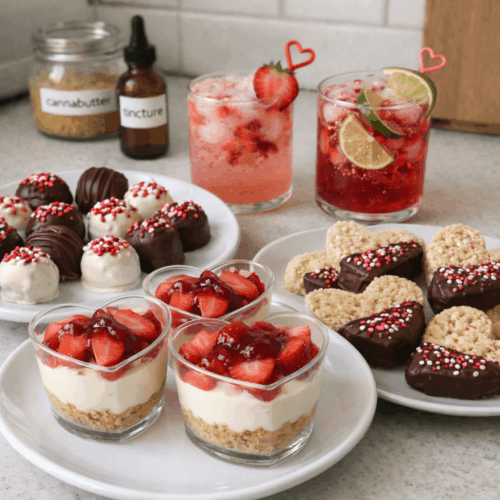
If you’ve been searching for no-bake infused Valentine’s Day treats or no-bake edibles made with cannabutter, this one’s for you. These are cute, simple, and realistic to make without turning Valentine’s Day into a full-time job. I’m sharing 3 no-bake infused treats plus 2 easy weed mocktails that feel a little fancy but still low effort.

Quick note: 21+ only where cannabis is legal. Dose responsibly and don’t do the “it’s not working so let me eat three more” thing. We’ve all been there.

Dosing that actually makes sense (simple and specific)

Before we get into the cute desserts, I want to make dosing easy. Nothing ruins a cozy night faster than accidentally sending yourself into outer space because you guessed your cannabutter strength.

First things first, you need a rough idea of how strong your cannabutter is. If you’re making it from scratch, use my step-by-step recipe here: → My Cannabutter Recipe

Once you know your butter is roughly X mg per tablespoon, the rest is straightforward.

For Valentine’s treats, I always recommend keeping it gentle:

  • 5mg per serving = cute + chill + functional
  • 10mg per serving = stronger (only if you already know your tolerance)

Here’s the formula I use every time:

Total THC in the batch ÷ number of servings = mg per serving

So if your cannabutter is 20mg per tablespoon and you use 2 tablespoons, that’s 40mg total in the batch. If you split it into 8 servings, you’re at 5mg each (40 ÷ 8 = 5). That’s the sweet spot.

Now to the fun stuff!

No-Bake Infused Valentine’s Day Treats (Made With Cannabutter)


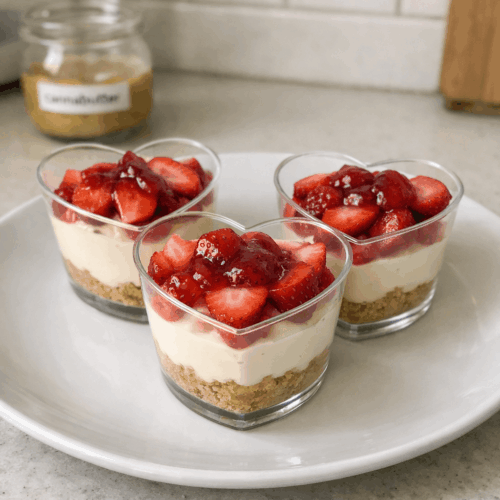
1) No-Bake Infused Strawberry Cheesecake Cups

These look like you bought them from somewhere cute, but they’re honestly one of the easiest things on the planet. Perfect if you want Valentine’s dessert vibes without baking anything.

What you need

  • 8 oz cream cheese (softened)
  • 1½ cups whipped topping (or whipped heavy cream)
  • 2–4 tbsp powdered sugar (to taste)
  • 1 tsp vanilla
  • crushed graham crackers or Golden Oreos
  • strawberries (fresh) or a spoon of strawberry jam

How to infuse it without ruining the texture

The best way to dose these evenly is infusing the crust layer. The cheesecake stays smooth, and you don’t have to worry about weird butter pockets.

Crust base

  • 1 cup crushed grahams
  • 2 tbsp melted cannabutter (or 1 tbsp cannabutter + 1 tbsp regular butter)

Dosing example (5mg per cup)

If your cannabutter is 20mg per tablespoon, then:

2 tbsp = 40mg total

If you make 8 cups: 40 ÷ 8 = 5mg per cup

Quick method

  1. Mix crushed grahams + melted cannabutter
  2. Press into the bottom of 6–8 small cups
  3. Beat cream cheese + sugar + vanilla until smooth
  4. Fold in whipped topping
  5. Spoon into cups
  6. Top with strawberries (or jam)
  7. Chill 30 minutes… or eat it immediately, I’m not judging!

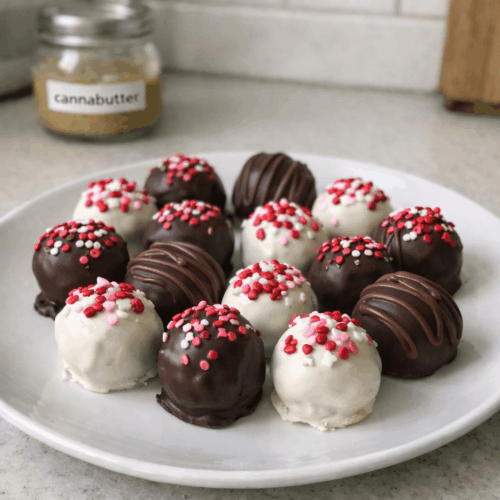
2) No-Bake Infused Oreo Truffles


These are dangerous because they taste like bakery desserts with basically zero effort. They’re also perfect if you want something bite-sized and cute.

What you need

  • 1 pack Oreos
  • 8 oz cream cheese
  • chocolate chips or candy melts
  • sprinkles

How to infuse them without making it complicated

Instead of infusing the whole chocolate coating (which can get messy), do an infused drizzle. It keeps the dosing simple and you still get the effect.

Infused chocolate drizzle

  • Melt ½ cup chocolate
  • Stir in 1 tbsp melted cannabutter (low heat, mix well)

Dosing example

If your cannabutter is 30mg per tbsp, that drizzle has 30mg total. If you drizzle it across 12 truffles: 30 ÷ 12 = 2.5mg per truffle (light dose) If you want closer to 5mg each, use 2 tbsp cannabutter in the drizzle, depending on your butter strength.

Quick method

  1. Crush Oreos into crumbs
  2. Mix with cream cheese
  3. Roll into balls (12–16)
  4. Chill 20 minutes
  5. Dip in regular chocolate OR drizzle the infused chocolate on top
  6. Add sprinkles and chill again

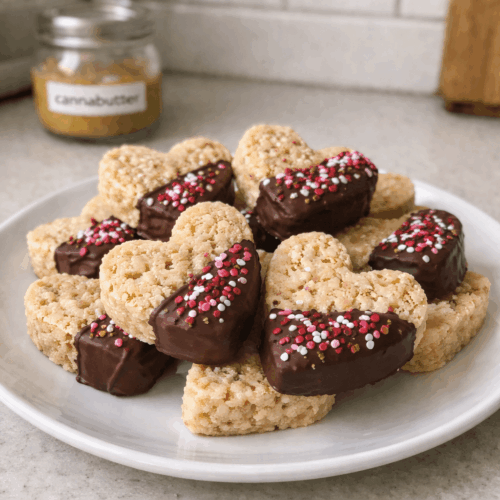
3) Infused Rice Krispie Hearts

This is the quickest “I made something” dessert ever. And the heart cutter makes it look like you really tried.

What you need

  • 6 cups Rice Krispies
  • 10 oz marshmallows
  • 3 tbsp butter total
  • heart cookie cutter

Easy dosing setup

I like doing a split butter situation:

  • 1 tbsp cannabutter
  • 2 tbsp regular butter

Example: if your cannabutter is 30mg per tbsp, the batch has 30mg total. Cut into 6 hearts = 5mg per heart.

Quick method

  1. Melt butter + marshmallows on LOW
  2. Stir in cereal
  3. Press into pan
  4. Cool 10 minutes
  5. Cut hearts

Optional but cute: dip half in chocolate and add sprinkles. Yum!

Easy Valentine’s Weed Mocktails (cute and beginner-friendly)

These are intentionally simple, because your treats can do most of the work. You can keep these non-infused, or add tincture if you want a little extra lift.

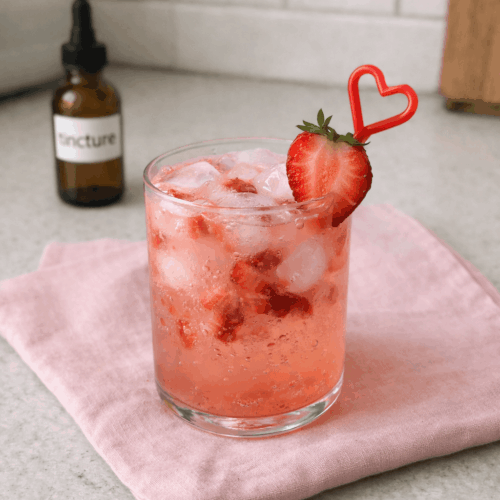
Mocktail 1: Strawberry “Rosé” Mocktail

  • strawberry puree or muddled strawberries
  • lemon or lime juice
  • sparkling water or non-alcoholic rosé
  • ice

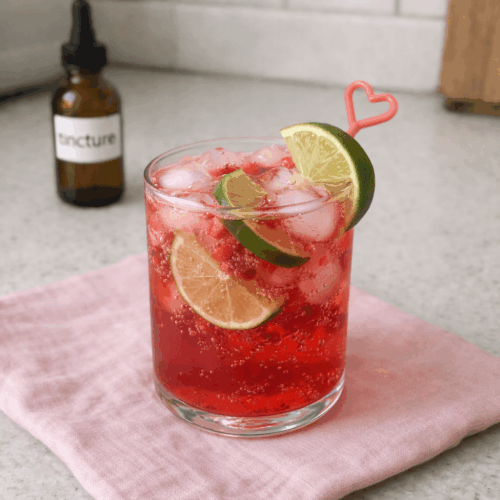
Mocktail 2: Cherry Limeade Mocktail

  • cherry juice
  • lime juice
  • Sprite/7UP or club soda
  • ice

If you want to infuse mocktails safely (use tincture)

Tincture is the safest option for drinks because it’s measurable. If you’re also eating treats, I suggest starting small, like 2.5mg per drink. 

How to do it

  1. Check your tincture label (mg per dropper)
  2. Add the tincture to the glass BEFORE pouring the drink
  3. Stir well

Example

If your tincture is 10mg per dropper:

  • ¼ dropper ≈ 2.5mg
  • ½ dropper ≈ 5mg

One rule: don’t free-pour tincture into a pitcher. Do individual glasses so everyone controls their own dose! 

Valentine’s tips for a cute night that doesn’t knock you out

If you want to do a little infused Valentine’s setup without accidentally overdoing it, the easiest thing is keeping it simple and keeping the dose low. You don’t need a full dessert table or anything dramatic. One treat, one drink, and a cozy vibe is more than enough. I’m always aiming for “cute and controlled,” not “help why is the room spinning.”

The safest way to do it is making your treats around 5mg each, especially if you’re trying more than one thing. That’s the sweet spot where you can actually enjoy the night and not be stuck waiting for your edible to stop yelling at you. If you know you have a higher tolerance, you can go up, but Valentine’s is not the day to experiment with your limits.

For the mocktails, I honestly recommend keeping them non-infused if you’re planning to eat treats. That way, if you want a second dessert or you want to snack again later, you’re not stacking your dose without realizing it. A cute drink can still feel special without being medicated. If you do want to infuse your mocktail, I’d keep it super light, like 2.5mg max, and only if you’re not going heavy on the treats.

And please don’t let the “it’s been 20 minutes and I don’t feel anything” thought win. Edibles will humble you. Give it at least 60–90 minutes before you decide you need more. The goal is a soft night in, not a surprise trip to the moon because you got impatient after a strawberry cheesecake cup.

To make it feel like Valentine’s without doing the most, you only need a couple small touches. Heart sprinkles, a pink straw, a candle, or even just putting everything on a cute tray instantly makes it feel intentional. It doesn’t have to be a whole Pinterest production. A little effort goes a long way when the snacks are already giving cute.

If you make one thing from this post, make the cheesecake cups. They’re easy to portion, easy to serve, easy to dose, and they look like you put in way more work than you actually did. That’s my Valentine’s Day plan! Cute treats, chill dose, and nobody getting accidentally launched into space (unless I want to)!

5 Cozy Ways to Use Cannamilk at Home

5 Cozy Ways to Use Cannamilk

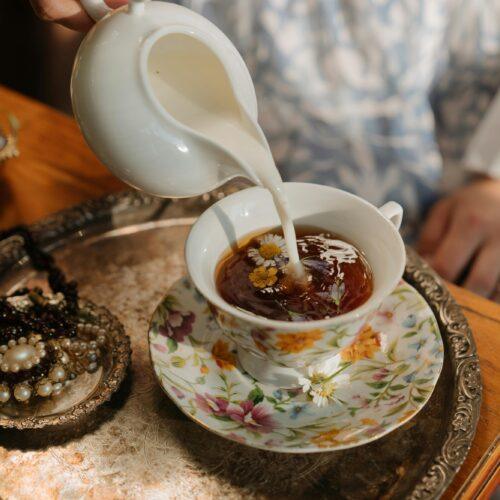
Close-up of a barista pouring creamy milk into coffee, representing how to use homemade cannamilk in drinks.

If you’ve been wondering what to make with cannamilk, this post is your sign to use it!

Picture this, you’ve finally made your first batch of cannamilk, it’s chilling in the fridge looking all proud of itself, and now you’re wondering, “Okay… what can I actually make with it?” Cannamilk is the cozy base of every infused recipe you’ll ever love. Here are five of my favorite things to make with cannamilk when I want something easy, comforting, and just a little bit elevated.

This post may contain affiliate links. If you buy something through one of them, I may earn a small commission at no cost to you. I only link things I actually use and love.

1. Infused Hot Cocoa

This one’s a classic. Warm up a cup of cannamilk, whisk in cocoa powder, sugar, and a pinch of cinnamon. That’s it. I like topping mine with infused whipped cream (yes, a double dose of fun) and sipping it while I scroll or read on my Kindle.

🖇 Want to learn how to make it? Check out my How to Make Infused Hot Cocoa for Cold Nights post!

2. Cannamilk Pancakes

I love weekend breakfast/brunch. You wake up and make the best pancakes and bacon, served with eggs and toast. Want to elevate it even more? Just swap regular milk for cannamilk in any pancake mix. It gives a soft herbal vibe that pairs perfectly with honey or syrup. And better yet, no hangovers!

Ash Jane’s Pick: Weed leaf waffle maker! Yes, I know, I know it’s a waffle maker, but I couldn’t resist, and I love my similar version at home!

3. Infused Coffee or Latte

I have to admit, when I wake up, if I’m not thinking about my morning sesh, I’m thinking about my decaf coffee. (Yes, decaf, unfortunately, ya girl has a caffeine sensitivity!) If I have a long morning ahead of me and cannot smoke a whole joint, I opt for a splash of cannamilk in my morning coffee or froth it up for a cozy latte. It gives me a huge head start to my day!

4. Cozy Cereal Bowl

This one is a no-brainer. Sometimes you don’t need a full recipe; you need a quick bowl of cereal, and that is totally okay! Pour cold cannamilk over your favorite cereal, light a candle, and call it a moment of soft and leisurely mornings.

5. Infused Smoothie

If you’ve got leftover cannamilk, toss it in a blender with banana, strawberries, blueberries, milk, yogurt, some flax seeds and protein powder. Congrats, you just made yourself a yummy infused strawberry blueberry banana smoothie! I tend to make these before a pilates workout. (I’m trying so hard to become a pilates hottie!)

Those are my favorite things to make with cannamilk when I want to keep it simple but still feel like I’m living my cozy, herbal, soft-life dream. Some days I want the hot cocoa, other days I’m much more likely to throw something fruity into the blender and call it breakfast, but I like having a few easy options depending on what I’m in the mood for.

Want More Ways to Use Cannamilk? Try My Cannabis Smoothie Recipes

If the infused smoothie is sounding especially good right now, I put five of my favorite cannabis smoothie combinations into a free recipe pack, including fruity, chocolatey, citrusy, and green options using cannamilk, cannahoney, and cannabutter. Grab it below and save it for the next time you want something a little different from your usual cannabis routine.

How to Make Infused Hot Cocoa for Cold Nights

How to Make Infused Hot Cocoa for Cold Nights

There’s something about cold nights that makes me crave cozy everything, and this canna-infused hot cocoa recipe has become my favorite way to wind down when the nights get long. This infused hot cocoa is one of my favorite night rituals when I want to wind down, get a little high, and feel like I’m wrapped up in a hug.

This post may contain affiliate links, which means I might earn a small commission at no extra cost to you. I only link to things I actually use or love.

🍫 Why I Love This Recipe

I’m not a complicated edible girl. I like simple, cozy things that hit slow and smooth, and this recipe checks every box. It tastes like regular rich hot cocoa, but the infused butter or honey adds just enough kick to make a cold night feel soft around the edges.

You can make it with cannabutter, canna honey, or even cannamilk if you’ve already made that before, if not, I have recipes of that linked in the ingredients! The high comes on mellow and cozy, perfect for quiet nights, movies, or writing when your brain needs to chill but not shut off.


What You’ll Need

You don’t need anything fancy, but a cute mug makes everything taste better.

Here’s my setup (1 serving) lately:

  • 1 cup milk or alt milk (I like oat or almond)
  • 1 tbsp cannabutter or canna milk (check out my posts linked to learn how to make them!)
  • 2 tbsp cocoa powder (or your favorite mix — I love this one on Amazon)
  • 1 tbsp sugar or maple syrup
  • pinch of salt
  • whipped cream, marshmallows, or drizzle (optional)
  • Cute mug + spoon set for the cozy aesthetic
  • Optional: Milk frother — it makes the texture velvety and café-level smooth

☕️ How to Make It

  1. Warm your milk on low heat, don’t boil it!
  2. Stir in cocoa powder and sugar until it’s silky.
  3. Add your cannabutter (or cannamilk) and let it melt in completely.
  4. Whisk or froth it up until everything looks rich and smooth.
  5. Pour it into your favorite mug, top it with whatever feels cozy, and sip slow.

It’s simple, but the flavor hits deep — sweet, creamy, and warm enough to melt away a long day.

🌿 Dosing Notes (Keep It Chill)

If you’re using a new batch of cannabutter or cannamilk, start with a light dose, about ½ teaspoon to 1 teaspoon. Sip slowly, wait at least an hour, and then decide if you want more. Infused drinks hit differently than baked edibles, especially when there’s fat (like milk or butter) involved.

And if you make extra, keep it in the fridge. Warm it up the next night for instant coziness without the cleanup.

Sometimes I roll up after I finish my mug; sometimes I’m already there before the first sip. Either way, it’s become my favorite cold-night ritual. This isn’t just about getting high; it’s about slowing down, softening up, and letting your space hold you for a bit. Try out this recipe now!

How I Use Cannabis-Infused Smoothies Instead of Smoking First Thing

How I Use Cannabis-Infused Smoothies Instead of Smoking First Thing

I absolutely love my wake and bakes. There is something about that first part of the morning, or afternoon if I slept in, when I can roll a joint, make my coffee, sit for a minute, and have a little time to myself before I start tackling whatever I have planned for the day.

But sometimes I want the cannabis without smoking first thing, which is how I started making cannabis-infused smoothies with things like cannamilk, cannahoney, and cannabutter. They have become one of my favorite alternatives to a morning joint when I still want to enjoy cannabis but do not necessarily want to start my day by smoking.

The problem is that now that I am in my 30s, sometimes the joint-and-coffee combination hits a little differently than it used to. There are mornings when it is exactly what I want, and then there are mornings when I realize I have completely overcommitted to the vibe and still have an entire day of things that actually need to get done.

Combined with trying to get more consistent with my workouts and making better choices in the kitchen, I started thinking about other ways I could keep the part of my morning cannabis ritual that I love without automatically reaching for a joint the second I get up.

For a while, I kept it extremely simple and would take a little distillate under my tongue, then wait until later in the day to smoke. It worked, technically, but I hated it. Going from rolling a joint, making my coffee, and having an actual morning ritual to taking one little drop and moving on with my life was just not doing it for me. I really wanted something with a little more personality.

And if there is one thing I love almost as much as cannabis, it is beverages. I am absolutely one of those people who can have water, coffee, something sparkling, and something fruity sitting around me at the same time, and I give no apologies for it. Once the idea of cannabis-infused smoothies popped into my head, it made almost too much sense. I already had fruit, I already had a blender, and I was already making different cannabis infusions at home, so really all I needed to do was put everything together.

I Was Not Trying to Become a Wellness Girlie Overnight

This was never about waking up one morning and deciding I needed to start tracking macros, buying twelve different powders, or turning my kitchen counter into a supplement store. I just wanted another way to enjoy cannabis in the morning that still felt like something.

Smoothies already worked for me because I usually have fruit around, I can make one without turning breakfast into an entire project, and there are enough combinations that I do not feel like I am drinking the exact same thing every day. Once I realized I could use some of the cannabis infusions I was already making, it really opened things up.

How I Make Cannabis-Infused Smoothies

Most of the time, I use cannamilk or cannahoney because they work really well with fruit, but I also use cannabutter in some of the richer smoothies, especially the ones that lean more dessert than breakfast.

For something fruity, I usually reach for cannahoney because it blends in easily and adds sweetness without changing the whole flavor of the smoothie. For creamier blends, cannamilk makes the most sense because I can use it the same way I would use regular milk or almond milk.

And then there is cannabutter, which I like much more in smoothies with things like chocolate, peanut butter, or banana. My Choco-High Peanut Butter Smoothie uses almond milk, cocoa powder, peanut butter, frozen banana, and melted cannabutter, and it is definitely one of the more dessert-style options in the pack.

I also sometimes use distillate if that is what I already have on hand, although I am much more careful with it because it is easy to underestimate how much you are adding when you are just squeezing a little into the blender. The biggest thing for me is that I am not trying to force the exact same cannabis ingredient into every smoothie just because it is infused. I would rather use whatever actually works with the flavor I am making.

Cannamilk, Cannahoney, or Cannabutter?

I already use cannamilk in a few different ways, and smoothies were an easy addition because I could swap it in anywhere I would normally use milk or a nut milk.

Cannahoney works especially well when I am making something fruity or citrusy, which is why I use it in smoothies like my MangoBerry Bliss and Orange High Dream.

The MangoBerry Bliss uses mango, mixed berries, a liquid base, and cannahoney, while the Orange High Dream uses orange juice, yogurt, frozen banana, and cannahoney for something that tastes a little like an infused creamsicle.

Cannabutter is the one I save for heavier flavors because I do not necessarily want buttery strawberry or mango anything, but chocolate and peanut butter can absolutely handle it. The nice thing about having a few different infusion options is that I can make the smoothie around what sounds good instead of making the flavor work around the cannabis.

My Favorite Cannabis Smoothie Combinations

Some mornings I want something bright and fruity because I do not feel like eating anything heavy, especially if I am trying to get moving early. Other days, I want something that feels much closer to dessert, which is when I lean toward chocolate, peanut butter, banana, or something creamier. I also somehow managed to make myself a green smoothie person without actually becoming a green smoothie person.

My Green Pineapple Dream has pineapple, mango, spinach, kale, a liquid base, and cannamilk, with avocado and citrus juice as optional additions. It sounds much more responsible than I normally am before noon, but it is actually really good. I also have my Strawbanana High Smoothie, which is probably the easiest place to start because it is basically a strawberry-banana smoothie with cannamilk added in, and there is nothing overly complicated about it.

I do not follow strict recipes every single time because I am still going to add a little more fruit, use whatever milk I have, or throw in something extra depending on what is in my kitchen that day, but I like having a few combinations that I know work when I do not feel like thinking about it.

Why I Sometimes Choose an Infused Smoothie Instead of a Morning Joint

I have not stopped smoking in the morning forever, and I am definitely not pretending an infused smoothie transformed me into somebody who wakes up at 6 a.m., journals, stretches, and goes for a sunrise run. Sometimes I still want my joint and my coffee. But I like having another option.

There are mornings when I know I need to work, write, clean up around the house, exercise, or just be a little more functional than I might be after getting too comfortable with a joint and a cup of coffee. On those days, making an infused smoothie gives me the ritual part I was missing when I tried simply taking distillate and moving on.

I still get to go into the kitchen and make something. I still get to choose what I want. I still have my little morning moment before everything else starts. It just looks different. And because cannabis-infused drinks and edibles can take time to kick in and can feel very different from smoking, I am careful with how much of my infusion I use. The smoothie pack includes the infusion amounts I normally build the recipes around, but potency can vary depending on how strong your cannamilk, cannahoney, cannabutter, or distillate actually is.

The pack also includes the reminder I use myself, which is to start low and give it time before deciding you need more, because you can always add more next time, but you cannot un-drink the smoothie you already finished.

Get My 5 Cannabis Smoothie Recipes

Once I figured out a few combinations I kept going back to, I decided to put them all together in one place instead of making myself remember what I did every time I pulled out the blender.

The free cannabis smoothie recipe pack includes my Strawbanana High Smoothie, Choco-High Peanut Butter Smoothie, MangoBerry Bliss Smoothie, Orange High Dream Smoothie, and Green Pineapple Dream Smoothie, along with the ingredients, directions, and notes on the different cannabis infusions I use.

You definitely do not need to become a smoothie person every morning, and I have not. I just like having something else in the rotation for the days when smoking first thing sounds great in theory but might not be the best way for me to start the day.

If that sounds familiar, grab the smoothie pack below and steal one of mine, I’m happy to share! 

 

Cannabis-Infused Fall Drinks for Cozy Nights In

Cannabis-Infused Fall Drinks for Cozy Nights In

Autumn is the perfect time to reinvent your favorite classics with a cannabis twist! While I love enjoying a joint in the crisp, cool air surrounded by the scent of fall candles, I’ve been exploring new ways to infuse cannabis into my lifestyle, starting with cozy, cannabis-infused fall drinks. If you’re a seasoned pro or just canna-curious, these cannabis-infused drinks, like pumpkin spice latte and hot chocolate, offer a delicious way to embrace the season. Ready to try something new? Let’s dive into these comforting fall drinks!

Cozy mug by the window with fall decorations, including leaves and pumpkins, creating a warm and inviting autumn atmosphere.

Key Ingredients for Cannabis-Infused Fall Drinks

Types of Cannabis

  • THC vs. CBD: Start by choosing the type of cannabis that suits your needs. THC offers psychoactive effects, while CBD provides relaxation without the high. You can also opt for a balanced mix of both for a more nuanced experience.
  • Decarboxylated Cannabis: Before using cannabis in any infusion, it needs to be decarboxylated. This process involves heating the raw cannabis to activate the cannabinoids, making it effective when infused into your drink.

Cannabis Infusions

  • Cannabis-Infused Milk or Cream: This versatile base is perfect for any creamy drink. You simmer cannabis in milk or cream for about 30-45 minutes. The fat in these dairy products helps extract the cannabinoids, making them perfect for lattes or hot chocolates.

  • Cannabis-Infused Honey or Agave: Cannabis-infused honey or agave syrup can be a sweeter option. It’s excellent for teas or as a sweetener in cocktails, blending well with the earthy notes of cannabis.

  • Cannabis Tincture: Tinctures are alcohol-based extracts that can be added to almost any drink. A few drops can infuse your beverage without altering the flavor, ideal for cocktails or light drinks.

Fatty Ingredients for Infusion

  • Butter: Butter is a popular fat for cannabis infusions. It can be used in decadent drinks like hot chocolate or bulletproof coffee, making it an excellent option for those who enjoy indulgent beverages.
  • Coconut Oil: This fat-friendly option works well in smoothies or as a base in warm drinks.

With these different infusion methods in your toolkit, you can tailor each drink to your taste and preferred experience. Now that you know the key ingredients and techniques, let’s craft some cozy, cannabis-infused fall drinks!

Cannabis-Infused Pumpkin Spice Latte

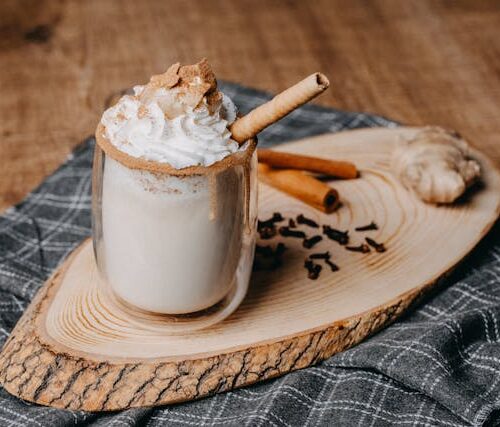
A cozy cannabis-infused pumpkin spice latte topped with whipped cream and a sprinkle of pumpkin spice.

Ingredients:

Serving Size: 1 per serving

Equipment Needed: Saucepan, whisk, and mug.

  • 1 cup of cannabis-infused milk (dairy or non-dairy)
  • 2 tablespoons of pumpkin puree
  • 1 tablespoon of sugar (or more to taste)
  • 1/4 teaspoon of pumpkin pie spice, plus more for topping
  • 1/4 teaspoon of vanilla extract
  • 1/2 cup of strong brewed coffee or espresso
  • 1/2 teaspoon pumpkin spice mix (optional, but recommended for an extra flavor boost)
  • Whipped cream (optional for topping)

Instructions:

  1. Prepare the Pumpkin Mixture: In a small saucepan, combine the pumpkin puree, sugar, pumpkin pie spice, and 1/2 teaspoon of pumpkin spice mix (optional) over medium heat. Stir constantly for about 2 minutes until the mixture becomes hot and fragrant.
  2. Heat the Milk: Slowly whisk the cannabis-infused milk and vanilla extract into the saucepan. Continue heating until the mixture is warmed through, ensuring it doesn’t reach a boil.
  3. Combine with Coffee: Pour your strong brewed coffee or espresso into your favorite mug. Add the pumpkin-milk mixture, stirring well to blend the flavors.
  4. Serve: For that finishing touch, top your latte with whipped cream and an extra sprinkle of pumpkin pie spice and pumpkin spice mix (optional).

If you prefer using a pre-made chai tea mix, substitute the black tea bag, cinnamon stick, cardamom pods, ginger, and cloves with 1-2 tablespoons of the chai mix. Steep it directly in boiling water for 3-5 minutes before adding your infused milk or cannabis tincture.

Cannabis-Infused Cinnamon Vanilla Latte

A rich cinnamon vanilla latte infused with cannabis, served in a mug with a cinnamon stick garnish.

Ingredients:

Serving Size: 1 per serving

Equipment Needed: Saucepan, frother, and mug.

  • 1 cup of infused milk
  • 1/2 teaspoon vanilla extract
  • 1/2 teaspoon ground cinnamon
  • 1 shot of espresso or 1/4 cup of strong brewed coffee
  • 1 tablespoon sugar or sweetener of your choice (optional)
  • Whipped cream (optional for topping)
  • Extra ground cinnamon (for dusting)

Instructions:

  1. Heat the Milk: In a small saucepan over medium heat, combine the milk, vanilla extract, and ground cinnamon. Stir occasionally, allowing the milk to heat until it’s steaming but not boiling.
  2. Prepare the Coffee: Brew your espresso or strong coffee.
  3. Mix and Froth: If you have a frother, froth the heated milk mixture until it’s nice and foamy. If you don’t have a frother, shake the heated milk in a tightly sealed jar or whisk it vigorously.
  4. Combine: Pour the espresso or strong coffee into a mug. Gently pour the frothy milk mixture over the coffee.
  5. Sweeten (Optional): If desired, stir in sugar or sweetener.
  6. Top It Off: If you like, add whipped cream and dust with extra cinnamon.
  7. Infuse: For a nondairy option, replace the infused milk with a few drops of cannabis tincture to the final mixture.


Cannabis-Infused Hot Apple Cider

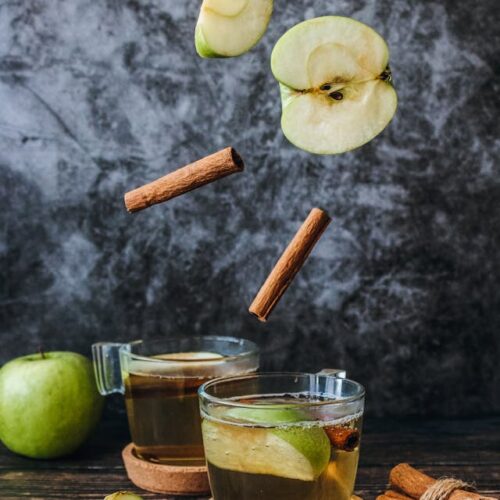
Steaming mug of cannabis-infused hot apple cider with cinnamon sticks and apple slices

Ingredients:

Serving Size: 1 per serving

Equipment Needed: Saucepan and mug

  • 2 cups apple cider
  • 1 cinnamon stick
  • 2 cloves
  • 1 star anise (optional)
  • 1 slice of orange (optional)
  • 1 teaspoon honey or maple syrup (optional, for sweetness)
  • 1 tablespoon cannabis-infused honey or 1-2 drops of cannabis tincture

Instructions:

  1. Simmer the Cider: In a small saucepan, combine the apple cider, cinnamon stick, cloves, star anise (if using), and orange slice. Bring the mixture to a gentle simmer over medium heat.
  2. Sweeten (Optional): If your cider is a bit sweeter, stir in the honey or maple syrup.
  3. Infuse: If making the cannabis-infused version, add the cannabis-infused honey or a few drops of cannabis tincture after removing the cider from the heat. Stir well to combine.
  4. Strain and Serve: Remove the cinnamon stick, cloves, star anise, and orange slice. Pour the hot cider into a mug.
  5. Garnish (Optional): Add a fresh cinnamon stick or a slice of orange for garnish.

Cannabis-Infused Spiced Chai Tea

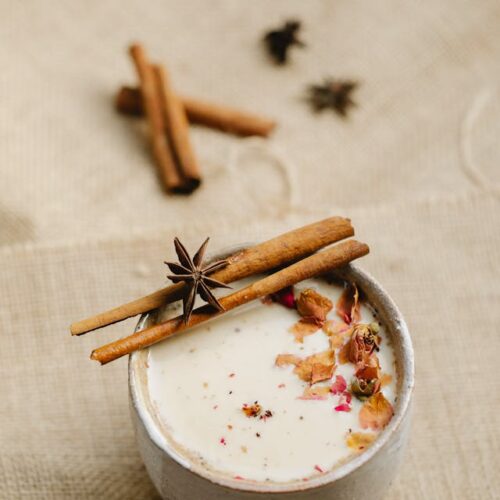
A cup of spiced chai tea with a cannabis twist, garnished with a cinnamon stick.

Ingredients:

Serving Size: 1 per serving

Equipment Needed: 

  • 1 cup water
  • 1 black tea bag
  • 1/2 cup infused milk
  • 1 cinnamon stick
  • 2-3 cardamom pods
  • 1 slice of fresh ginger
  • 2-3 whole cloves
  • 1 teaspoon honey or sugar (optional, for sweetness)
  • 1-2 drops of cannabis tincture or 1 teaspoon of cannabis-infused honey (if not using infused milk)

Instructions:

  1. Boil Water and Spices: Bring the water to a boil in a small saucepan. Add the cinnamon stick, cardamom pods, fresh ginger, and cloves. Let it simmer for 5-10 minutes to allow the spices to infuse the water.
  2. Add Tea: Add the black tea bag to the simmering water and steep for 3-5 minutes, depending on how strong you like your tea.
  3. Add Milk and Sweeten: Stir in the infused milk. If you’re not using infused milk, add the cannabis tincture or cannabis-infused honey at this point. Sweeten with honey or sugar to taste.
  4. Simmer and Serve: Let the mixture simmer for 2-3 minutes, then remove from heat. Strain the tea into a mug to remove the spices.
  5. Enjoy: Garnish with a cinnamon stick or a sprinkle of ground cinnamon if desired.

How to Safely Enjoy Cannabis-Infused Fall Drinks

When it comes to enjoying cannabis-infused fall drinks, it’s all about savoring the moment while keeping things chill and safe. Here’s how to make sure your cozy experience stays as warm and fuzzy as that favorite blanket you reach for when the temperature drops:

1. Start Small, Stay Cool

  • Take it Easy: It’s tempting to dive into a big mug of something delicious and infused, but if you’re new to this, start with a small amount of cannabis. Think of it like dipping your toes in the pool rather than diving in headfirst. The effects can creep up on you, so give it some time.
  • Start Slow with Dosage: If you’re new to cannabis-infused drinks, begin with 5 mg of THC per serving. This is a good starting point to gauge how your body reacts. If the effects are too mild, you can gradually increase the dosage in future preparations. Everyone’s tolerance is different, so listen to your body and adjust accordingly.
  • Be Patient: After your first sip, kick back and wait. It could take 30 minutes to a couple of hours to feel the full effects. This isn’t fast food; it’s a slow-cooked experience.

2. Set the Scene

  • Find Your Vibe: Whether on your couch with Netflix queued up or around a campfire with friends, pick a spot where you feel completely at ease. Your environment plays a big part in how you enjoy your infused drink.
  • Keep Water Nearby: Cannabis can sometimes dry you out, so keep a glass of water within arm’s reach. Plus, it’s just good practice to stay hydrated.

3. Know What Works for You

  • Know Your Limits: If you’re unsure how much is too much, err on caution. Less is more when it comes to edibles; you can always have more later if you feel comfortable.
  • Listen to Your Body: Take a breather if you feel too much. Remind yourself that this feeling is temporary. You’re in control, and it’s all part of the process.

4. Skip the Booze

  • No Mixing: Combining cannabis with alcohol can be like mixing oil and water—it doesn’t always go well. Stick with your cannabis-infused drink to keep things smooth and mellow.

5. Label and Store with Care

  • Mark Your Mugs: Label your infused drinks if you’re making a batch. You wouldn’t want someone accidentally grabbing your special brew, especially if they’re not expecting it.
  • Stash Safely: Keep your cannabis drinks out of reach of anyone who shouldn’t have them, especially kids and pets.

6. Plan for a Safe Night In

  • Stay In Once you’ve enjoyed your drink, plan to stay in for the night. It’s the perfect excuse to unwind without worrying about having to go anywhere.

These tips aren’t just about playing it safe, they’re about ensuring your experience is as enjoyable and stress-free as possible. After all, the best part of any fall drink is the cozy, relaxed vibe that comes with it.

As the leaves change and the air turns crisp, there’s nothing better than curling up with a warm, comforting drink. Adding a cannabis infusion to your favorite fall beverages brings a new level of relaxation and enjoyment. Take your time, savor the flavors, and let the cozy vibes of autumn wrap around you. Whether treating yourself or sharing with friends, these drinks will make your fall season even more delightful.

Want to take your Fall drinks to the next level? Learn how to make cannabis-infused milk and honey!  Click here for simple recipes, and start infusing your favorite beverages today!

How to Make Cannabutter (Easy Step-by-Step Recipe)

How to Make Cannabutter (Easy Step-by-Step Recipe)

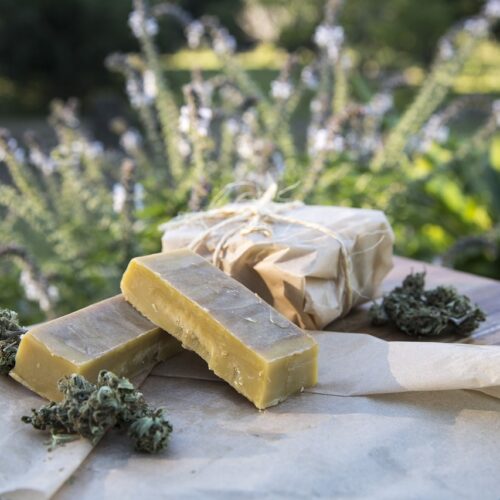
Blocks of cannabis butter on a wooden cutting board, surrounded by cannabis buds and wrapped in parchment paper, with a natural outdoor background

Have you ever tried making cannabutter for the first time and ended up with a complete mess? That was me and my ex, diving into the process with high hopes and zero cheesecloth. What we ended up with was a lumpy, grassy concoction that tasted more like lawn clippings than anything remotely delicious.

Don’t even get me started on us learning what we could and couldn’t do in the kitchen with cannabutter, that’s a story for another time. But that kitchen disaster taught us the importance of proper straining and equipment. Through trial and error, we also discovered that ghee can be an excellent alternative for those looking for a richer, nuttier flavor (and yes, it works for cannabutter!).

In this guide, I’ll walk you through foolproof steps to make perfect cannabis-infused butter at home. Whether you’re a seasoned pro or a curious newbie, I’ve got you covered. Let’s make sure your edibles are delicious, potent, and, most importantly, smooth, no grassy mess included!

What is Cannabutter?

Cannabutter is simply butter that has been infused with cannabis, turning it into a versatile ingredient that elevates any dish. Whether you’re whipping up some brownies, making a savory pasta, or just spreading it on toast, cannabutter allows you to enjoy the benefits of cannabis in a tasty, discreet way.

The Basics:

Cannabutter is made by gently heating cannabis with butter, allowing the cannabinoids (like THC and CBD) to bind to the fat molecules in the butter. This creates a potent, infused butter that can be used in place of regular butter in any recipe.

Why Use Cannabutter?

  • Consistency: Edibles provide a consistent and long-lasting effect, unlike smoking or vaping.
  • Discreet Consumption: You can add cannabutter to almost any dish, making it a subtle way to consume cannabis.
  • Versatility: From sweet treats to savory dishes, cannabutter can do it all.

Fun Fact: Did you know that cannabutter can also be made using ghee, which is a clarified butter? Ghee has a higher fat content and richer flavor, making it perfect for infusing cannabis and enhancing the taste of your edibles!

Making cannabutter not only lets you enjoy cannabis in a delicious way but also gives you control over the dosage and strength of your edibles. You can tailor your cannabutter to be as potent or mild as you like, making it perfect for any occasion.

Ingredients and Equipment

Now that you know what cannabutter is, let’s dive into what you’ll need to make it. Getting the right ingredients and equipment is crucial for a successful infusion, ensuring you end up with a smooth and potent final product.
 

Ingredients:

  • Cannabis: About 7-10 grams of high-quality flower. The better the quality, the better your cannabutter will be.
  • Unsalted Butter: 1 cup. Using unsalted butter helps you control the flavor of your final product. (You can also use ghee for a richer, nuttier flavor.)
  • Water: 1 cup to help with the infusion process and prevent the butter from burning.

Equipment:

  • Saucepan: For melting the butter and infusing the cannabis. Make sure it’s large enough to hold all your ingredients comfortably.
  • Mixing Bowl: To hold the infused butter after straining.
  • Cheesecloth: Essential for straining out the plant material and getting a smooth final product.
  • Storage Container: To store your finished cannabutter. An airtight container works best to keep it fresh.

Pro Tip: Have a Magical Butter machine or thinking about an infusion machine? These products can streamline the process and ensure a consistent, high-quality result. Check out my affiliate post on the Magical Butter machine to see how it can make your cannabutter making experience even easier.

What is Decarboxylation?

Decarboxylation is the process of heating cannabis to convert THCA (tetrahydrocannabinolic acid) into THC (tetrahydrocannabinol) and CBDA (cannabidiolic acid) into CBD (cannabidiol). These active compounds are what give cannabis its effects.

How to Decarboxylate Your Cannabis

  1. Preheat Your Oven: Set your oven to 240°F (115°C). This is the optimal temperature for decarboxylation without burning your cannabis.
  2. Prepare Your Cannabis: Break up your cannabis into small, even pieces. You don’t need to grind it too fine, just enough to spread it out evenly.
  3. Bake the Cannabis: Spread the cannabis pieces evenly on a baking sheet lined with parchment paper. Bake for 30-40 minutes, gently turning the cannabis with a spatula halfway through to ensure even heating. The cannabis should turn a light golden brown.
  4. Cool Down: Remove the cannabis from the oven and let it cool. Your decarboxylated cannabis is now ready for infusion.

Making the Cannabutter

Now that your cannabis is decarboxylated, it’s time to infuse it into the butter. This process will allow the cannabinoids to bind to the fat molecules in the butter, creating a potent and versatile ingredient for your culinary adventures.

Step-by-Step Instructions:

  1. Melt the Butter:
    • In a saucepan, combine 1 cup of unsalted butter and 1 cup of water. The water helps regulate the temperature and prevents the butter from burning.
    • Heat the mixture over low heat until the butter melts completely.
  2. Add the Decarboxylated Cannabis:
    • Once the butter has melted, add your decarboxylated cannabis to the saucepan.
    • Stir gently to ensure the cannabis is evenly distributed throughout the butter.
  3. Simmer:
    • Maintain a low simmer (do not let it come to a boil) for 2-3 hours. This slow infusion process allows the cannabinoids to fully bind with the butter.
    • Stir occasionally to prevent sticking and to keep the mixture evenly heated.
  4. Strain:
    • After simmering, set up your cheesecloth over a mixing bowl. Carefully pour the mixture through the cheesecloth to strain out the plant material.
    • Gather the edges of the cheesecloth and squeeze out as much liquid as possible. Be cautious, as the mixture will be hot.
  5. Cool and Store:
    • Let the strained cannabutter cool to room temperature. The butter will separate from the water as it cools.
    • Once cooled, transfer the cannabutter to an airtight storage container, discarding the water layer. Store it in the refrigerator for up to 2 weeks or in the freezer for longer storage.

Tips for Making the Best Cannabutter:

  • Use High-Quality Butter: The better the butter, the better the final product. Consider using unsalted, organic butter or ghee for a richer flavor.
  • Low and Slow: Keep the heat low and simmer gently. High temperatures can destroy cannabinoids and reduce potency.
  • Proper Storage: Store your cannabutter in an airtight container in the fridge or freezer to maintain freshness and potency.

Dosage and Usage Tips

Understanding how to dose and use your cannabutter is essential for a great experience. Here’s a simple way to estimate the potency of your cannabutter and some practical tips for using it in your cooking.

Simplified Dosage Calculation

Calculate the Total THC Content:

    • THC Percentage: Check the THC percentage on your cannabis packaging.
    • Weight: Note the weight of the cannabis in grams.
    • Calculation: Multiply the weight (in grams) by 1000 to convert to milligrams, then multiply by the THC percentage.
      • Decide the number of servings you want from your cannabutter.
      • Divide the total THC content by the number of servings.

Example: If you have 7 grams of cannabis with 15% THC:

  • 7 grams x 1000= 7000mg 
  • 7000mg x 0.15 = 1050 mg of THC

Estimate THC Per Serving:

  • Decide the number of servings you want from your cannabutter.
  • Divide the total THC content by the number of servings.

Example: If you use the cannabutter to make 40 servings:

  • 1050mg/40 = 26.25mg THC per serving 

Understanding What This Means:

  • If your batch of cannabutter yields 1050 mg of THC and you divide it into 40 equal servings, each serving will contain approximately 26.25 mg of THC.
  • For Beginners: This might still be a strong dose. Beginners should start with 5-10 mg of THC per serving to gauge their tolerance. You can adjust the amount of cannabutter you use in your recipes to control the dose.

Practical Cooking Tips

Cannabutter can be used in a variety of recipes, from sweet treats to savory dishes. Here are some simple ideas:

  1. Baking with Cannabutter:
    • Substitute Wisely: Replace regular butter with cannabutter in your baking recipes. For example, if your cookie recipe calls for 1 cup of butter, you can use 1 cup of cannabutter but adjust the amount depending on your desired dosage.
    • Even Mixing: Ensure your cannabutter is evenly mixed into the batter or dough to distribute the THC evenly.
  2. Cooking Savory Dishes:
    • Infuse Oils: Cannabutter can be used in place of regular butter in cooking. Melt it over low heat and use it to sauté vegetables or stir into pasta.
    • Avoid High Heat: High temperatures can degrade THC, so cook on low to medium heat.
  3. Simple Spreads and Toppings:
    • Toast and Spreads: Spread cannabutter on toast or mix it into oatmeal for a quick and easy edible.
    • Finishing Touch: Use cannabutter as a finishing touch on popcorn or potatoes, adding it after cooking to preserve its potency.

Creating cannabutter at home can be a fun and rewarding process, allowing you to enjoy cannabis in a variety of delicious ways. By following the steps outlined in this guide, you can make high-quality cannabutter that suits your preferences and needs.

Key Takeaways:

  1. Decarboxylation: Essential for activating THC and CBD in your cannabis.
  2. Infusion Process: Slow and steady wins the race—keep the heat low and simmer gently.
  3. Dosage: Calculate carefully to ensure you get the right potency for your needs.
  4. Versatility: Cannabutter can be used in a wide range of recipes, from baked goods to savory dishes.

Whether you’re a seasoned pro or a curious newbie, I hope this guide has provided you with valuable insights and inspiration. Happy cooking and enjoy your cannabis-infused creations!